After the Freeze: A Concrete Inspection Checklist for Austin Homeowners
- Ace Concrete Contractors Austin
- Concrete Contractor Tips
Ace Concrete Contractors Austin

After a freeze, walk your driveway, walks, steps, and patio once the ice is gone and the concrete is dry. Look for new flaking, cracks that widened, joints that opened, panels that moved, and wet or sunken spots near pipes and sprinklers. Photograph everything before fixing anything.
A hard freeze in Austin is usually over in a few days, and it’s tempting to forget about it once the roads clear. But concrete damage from a freeze often shows up slowly, especially when water got under a slab. A twenty-minute walk around the house in the week after the thaw catches most of it while it’s still small, and you’ll know what you’re dealing with before the spring rains. This checklist covers what to look for and what each finding means. For the reasons behind it, see our guide to how freezes damage driveways.
Wait until the ice is fully melted and the concrete has had a day or two to dry. Wet concrete hides cracks, and icy steps aren’t worth the risk. Take your phone. Photos you take now give you something to compare against in a month, and they’re the first thing an insurer or contractor’ll ask for. If you have photos from before the storm, pull them up too.
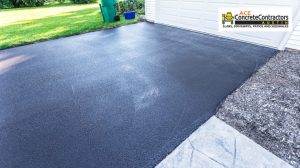
Start at the garage and work toward the street. It’s the order that makes the most sense, since that’s how water runs. Look for patches where the surface has flaked or peeled, especially along tire paths and where sprinklers hit. Check existing cracks: are any noticeably wider than before? A crack that’ll catch the edge of a coin is worth noting. Look at the joints, and note any filler that’s popped out or gaps that have opened.
Then check the edges and the apron at the street, where the concrete’s thinnest and most exposed. Finally, stand at the garage and look down the driveway at a low angle. A panel that’s dropped or tilted, even slightly, is easier to spot that way than from above.
Front walks get the same check: flaking, widened cracks, and panels that no longer line up. A new lip between panels is a trip hazard as well as a sign of movement, so note it. Our guide with common defects explained helps sort normal wear from real problems.
Steps deserve a closer look, since they’re where a small problem turns into a fall. Check the front edge of each tread for chips or cracks, and look where the steps meet the walk and the porch for new gaps. If a handrail is mounted in the concrete, give it a firm push and see if the base has loosened.
Patios often sit lower than the house and collect runoff, so they’re often still wet when a freeze arrives. Look for scaling, especially near downspouts and in low spots that held water. Check where the patio meets the house for a gap that’s opened, and look for any slab that’s tipped toward the house instead of away from it.
This is the part most people skip, and it’s the part that matters most. Walk past every hose bib, sprinkler valve, and spot where a pipe runs near concrete. Look for soggy ground, washed-out soil along a slab edge, or a new gap under a panel. A slab that sounds hollow when you tap it with a broom handle may have lost soil underneath. If you had a leak during the storm, note where it was and keep an eye on nearby concrete for the next few months. Sinking can take weeks to show, and it won’t announce itself. The pore water freeze explainer covers why leaks matter more than frost here.
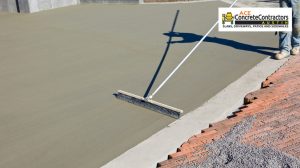
Sort your notes into three groups. Hairline cracks and light flaking can be watched, and sealing open cracks is a reasonable weekend job you can do yourself. Widened cracks, popped joints, and broken edges are worth a professional look before the spring rains, which push more water into them. Panels that have dropped, tilted, or sound hollow need attention soon, because the base underneath has likely moved, and it won’t move back. Our freeze damage assessments page explains how we decide between sealing, section replacement, and replacement. For walks with a new trip hazard, the sidewalk replacement options page covers the options. If a tree limb or another clear storm event caused the damage, check with your insurer and keep your photos.