
How to Pour a Concrete Slab, Step by Step
Extractive answer (46 words): Pouring a concrete slab runs in a fixed order: layout, excavation, compacted base, forms, steel on chairs, the pour, screeding and floating, control joints, then curing. Every step exists to prevent a specific failure, and the steps before the concrete arrives decide most of the result.
Every slab we pour follows the same sequence, shed pad or garage floor, and the sequence is the point: each step prevents a specific failure, and skipping one doesn’t show until the ground moves. This guide walks the order start to finish, says what each step is for, and flags where do-it-yourself pours most often go wrong. Read it before you pour your own, or read it to know what to look for in anyone you hire, including us. Our slab service page covers what we build; our slab pricing factors covers what moves the price.

Layout and excavation: the slab is designed on the ground
Paint the footprint, check it for square, and confirm what the slab’s got to meet: a door threshold, a building kit’s dimensions, a drainage path. Then strip the topsoil and cut to depth. The finished slab height is decided here, and so is the slope; even a pad that reads as level should shed water on purpose. The most common layout mistake we see is forgetting the building: a shed kit doesn’t forgive a pad an inch out of square, so the forms get measured twice.
Base and compaction: where slabs are won or lost
Gravel goes in over the cut subgrade, in lifts, each one compacted before the next. Compaction’s the step that separates a slab from a future repair call: base that’s dumped and raked flat settles under load, and the slab settles with it. On Austin clay the subgrade itself matters too. [CONFIRM process observation: e.g., we wet and recompact the clay before the first lift of gravel goes down, because dry clay under a base pulls moisture unevenly and moves.] A vapor barrier goes over the base wherever the slab will be enclosed. If your slab has already been poured and is sinking, that history lesson is our repair service in practice.
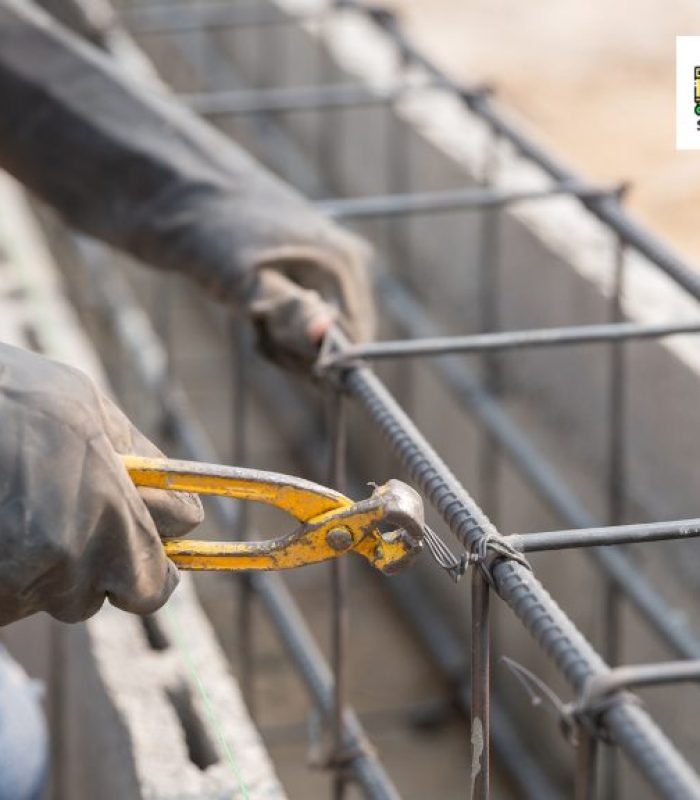
Forms and steel: holding shape, holding cracks
Forms are staked so the pour can’t push them, and checked for height as well as square, since the top of the form is the screeding guide. Steel goes in next, on chairs. That last detail is most of the job: rebar lying on the base does nothing, because steel only holds a crack closed from the middle of the slab. This is the step DIY pours skip most, and it’s invisible in the finished product until the first real crack opens up wide instead of staying hairline.
The pour: screed, float, joint, then leave it alone
Concrete arrives on a schedule the weather sets; in an Austin summer that means early morning, because the working time shrinks as the temperature climbs, and a crew that’s racing the surface doesn’t finish it well. It’s one of those details that doesn’t show up in a quote and shows up completely in the slab. The crew places it, screeds it flush with the forms, floats the surface, and finishes it, broom for traction or trowel for a smooth interior floor; our finishing techniques guide covers what each surface treatment involves. The mix matters too, and our concrete mix types guide explains it, because a slab that’ll carry a vehicle isn’t ordered the same as a garden pad. Control joints get cut the same day, spaced to the slab’s dimensions, giving the concrete straight lines to crack along instead of choosing its own. Then the hardest step: nobody touches it. Light foot traffic next day, real load in about a week, and our slab drying timeline guide covers the full timeline.
When to pour it yourself, and when not to
A small garden pad on a flat lot is a reasonable weekend project if you rent a compactor and put steel in it. The projects that go wrong are the ones where the stakes rose quietly: a slab that carries a building, a vehicle, or a hot tub, a sloped site that needs cut and fill, or clay that needs subgrade work. Those fail at the step the weekend didn’t include. We’d rather pour it once than repair it twice, and we’ll tell you honestly which kind of project yours is.
Questions we hear on this topic
What goes under a concrete slab?
Compacted gravel over a prepared subgrade, with a vapor barrier added wherever the slab will be enclosed, like a garage or workshop. The gravel goes in thin layers, each compacted before the next. On expansive clay, the subgrade under the gravel gets attention too, because the base is only as stable as what it sits on.
Can I pour a concrete slab myself?
A small pad on flat ground, yes, if you compact the base and set steel on chairs. A slab that carries a building, vehicle, or heavy equipment, or one on a sloped or clay-heavy site, is where DIY pours fail, usually at a step the weekend plan skipped. The concrete work is the easy half; the ground work is the job.
How thick should a concrete slab be poured?
Four inches is the residential baseline for foot traffic and light storage, with thicker sections and thickened edges wherever real weight sits: garages, workshops with equipment, RV pads, hot tubs. Thickness gets written into the plan before the pour, because it changes the excavation depth, the steel, and the concrete order.
When do you cut control joints in a new slab?
The same day as the pour, once the surface can hold a saw without raveling. Waiting until the next day is waiting too long; concrete starts shrinking immediately and will pick its own crack lines overnight. Joint spacing is set by the slab’s dimensions and, on clay, tighter is better.
How long before a new slab can hold weight?
Foot traffic the next day, a shed or framing in about a week, and heavy loads later than that, since concrete keeps gaining strength for about a month. The first week is when the slab is most vulnerable, so nothing gets dragged across it and nothing gets anchored into it until it’s ready.